Optimising a Python Docker Container
Introduction
Having worked with Python extensively over the past couple of years, when it came time to moving code into containers came an interesting challenge of how to make the image as optimised as possible. In the container world, and more specifically using Docker, an optimised image, in my opinion, would typically be the result of three things:
How quickly an image can be built. Effectively, the quicker an image can be built, the quicker it can be tested and ultimately integrated into running use. This is where the build cache comes into play and knowing how to use this can speed build time up tremendously.
The overall size of the image. This can be a consequence of the first item, however in some cases also may not. Having a small final image size will result in less storage required to store the image, and when every dollar may count for cloud services, reducing an image size from a couple of gigabytes to a few hundred megabytes can be mighty advantageous.
The security of the final image. This can indeed be related to the second item as typically unnecessary packages installed in the image can result in a bloated image size. Unnecessary packages can also lead to unnecessary vulnerabilities also. By only installing the latest, required packages to run your code in your container will help with reducing image size, but also assist with security. Of course, container security is also satisfied by following best practices such as not running your container as root user and only permitting permissions to required OS capabilities.
I will not be covering all the steps I take to satisfy these three requirements to their entirety here, however having gone through the steps to build an optimised Python container image, I have noticed the lack of information around regarding the best methods to do this, so lets get started.
Multi-stage Build
For those with basic understanding of building containers, the general layout of a Dockerfile would be to use a single-stage, starting from a base Python image, installing any required pip packages, copying in your code and finally executing the main script. That’s fine as the container will have everything that is required to run your code. However it will also have many unnecessary packages that come with the base image as well as also containing all the install binaries required to install your package requirements.
To reduce all that, we can use a multi-stage build which leverages the build cache to first install our required pip packages in a base image then start a new image and copy only the executables to the new image, leaving behind all the install binaries. We can also start our new image on a slim tag and further reduce our unnecessary packages to near zero.
Let’s look at a simple single-stage build for a Django project that would communicate with a PostgreSQL database. This requires at minimum two pip packages to be installed being Django and Psycopg2.
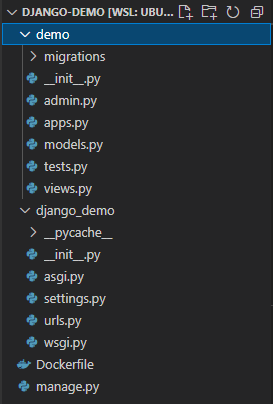
I will assume you have started a django project outside the container, similar to above image, so we will just copy everything from the base of the project into the container with the following Dockerfile.
FROM python:3.8

RUN pip install django psycopg2

COPY . /opt/demo

WORKDIR /opt/demo

CMD ["python3", "manage.py", "runserver"]
Building this image will generate an image size of 954M. For such a simple project so far, not a great size. Lets look at a multi-stage build and how this image size can be drastically improved.
FROM python:3.8 as builder

RUN pip install --user django psycopg2

FROM python:3.8-slim as final

COPY --from=builder /root/.local /root/.local
COPY . /opt/demo

ENV PATH=/root/.local:$PATH

WORKDIR /opt/demo

CMD ["python3", "manage.py", "runserver"]
To keep it short, we installed the pip packages inside a builder stage within a full sized python image as this contains all the additional packages required to install a package like psycopg2. Using the –user flag, the pip packages can be installed in an easy access location that can be simply copied across to the final slim base image, scrapping everything from the first image. For these packages to be useable, we must also add the directory path to our executable path, creating a usable container for our project with the absolute bare minimum of requirements.
With a few simple changes we have managed to get the exact same project into a image of size of 150M, reducing the time it takes for the container to be built, reducing the overall image size and effectively increasing security by removing the unnecessary packages.
Small note: With a few extra steps, a non-privileged user could be created and the same method of pip installing into the user’s .local directory can be done to run the container as a non-privileged user and further increase container security.